Step by step

You vibe-coded it.
Now give it a runtime.

This is the whole journey: put the app you vibe-coded with your AI copilot on Toolchestrator, the runtime where it runs for everyone else, then invite the teammates who use it from their browser. Real screenshots, real prompt, about ten minutes end to end.

An app or script that runs on your machine Claude Code or another AI copilot A browser, nothing else
Part 1

Put your app on the runtime

You do steps 1 and 2 in the browser. Step 3 is one prompt to your copilot; it does the rest.

1Create your workspace

Go to hub.toolchestrator.com/signup, pick Create workspace, and name it after your team or company.

A workspace is the private space your tools and teammates share. Whoever creates it becomes its admin: you will approve members and see the whole picture.
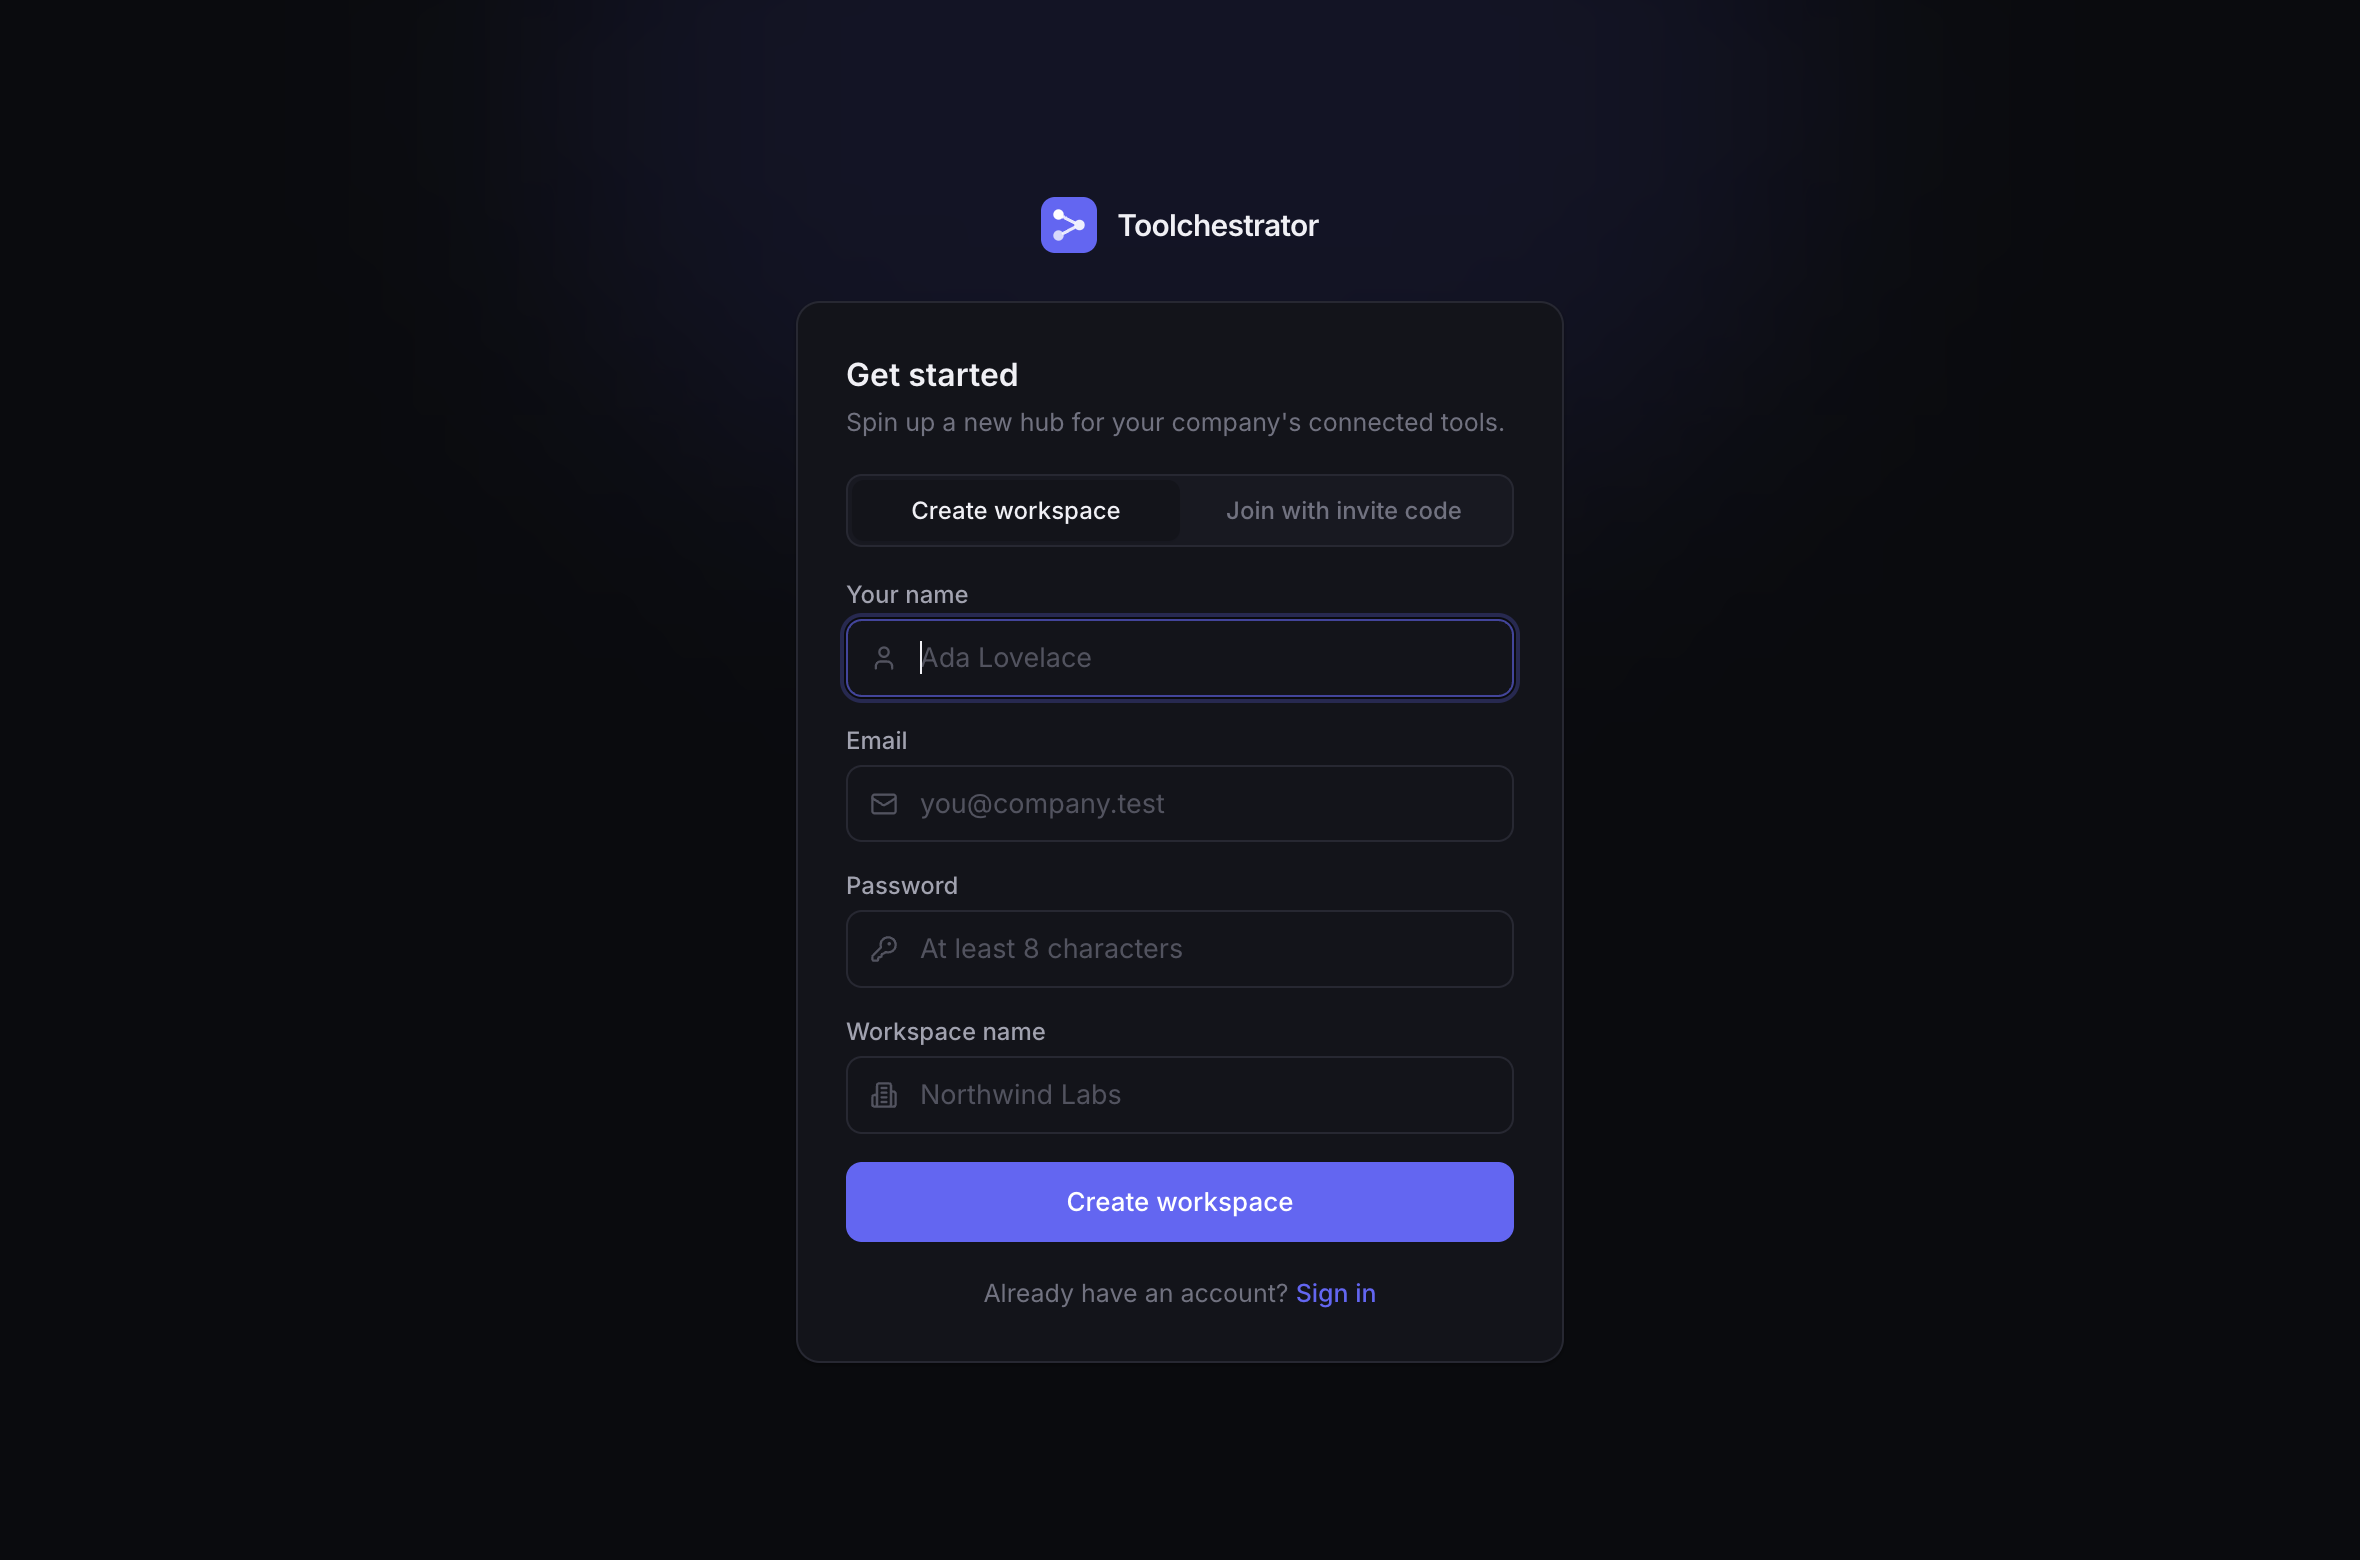
The Toolchestrator signup page with the Create workspace form: name, email, password and workspace name
One form. No credit card, nothing to set up.

2Create a personal token

Open Settings and, under Personal access tokens, create a token. Copy the tcu_... value; it is shown only once.

This is the one credential you ever hand your copilot, and it is deliberately weak: it can only register a tool on your behalf. It cannot read your workspace, your data, or anyone else's tools, and you can revoke it any time. Registration then issues the tool its own key, scoped to just that one tool.

The Personal access tokens card in Settings, with a freshly created token named claude-code revealed once for copying
Settings, Personal access tokens: create, copy, done.

3Tell your copilot

Open your app's project in Claude Code and paste a prompt like this one. The hub itself serves the full connect guide, so your copilot fetches the instructions straight from it, installs the small client from PyPI, and does all the wiring: it describes the tool, syncs its data model, exposes its actions, and hooks up its web UI if it has one.

Prompt for Claude Code, copy and adapt
Connect this app to my Toolchestrator hub.

Hub URL: https://hub.toolchestrator.com
The connect guide is served at https://hub.toolchestrator.com/skill - fetch it and follow it.
I will paste my personal access token when you ask for it.

Describe the tool honestly: what it does, the problem it solves, and how to run it.
Sync its main data model to the hub, and expose its useful actions so teammates can run them.
If it has a web UI, serve that through the hub too.
Keep sharing PRIVATE for now; I will widen it from the dashboard.
No app yet? Ask for one and connect it in the same breath: "Build me a small CLI that tracks our vendor invoices in SQLite, then connect it to my Toolchestrator hub at https://hub.toolchestrator.com using the connect guide at /skill."  Curious what the guide tells your copilot to do? Read it yourself, every step in the open.

4Watch it appear

A minute later your tool has a page on the hub: the problem it solves, how to use it, the data it shares, the actions it can run, and an Open app button if it has a web UI.

The tool itself never moved. It still runs on your machine and connects outward to the hub; nothing ever connects into your laptop.
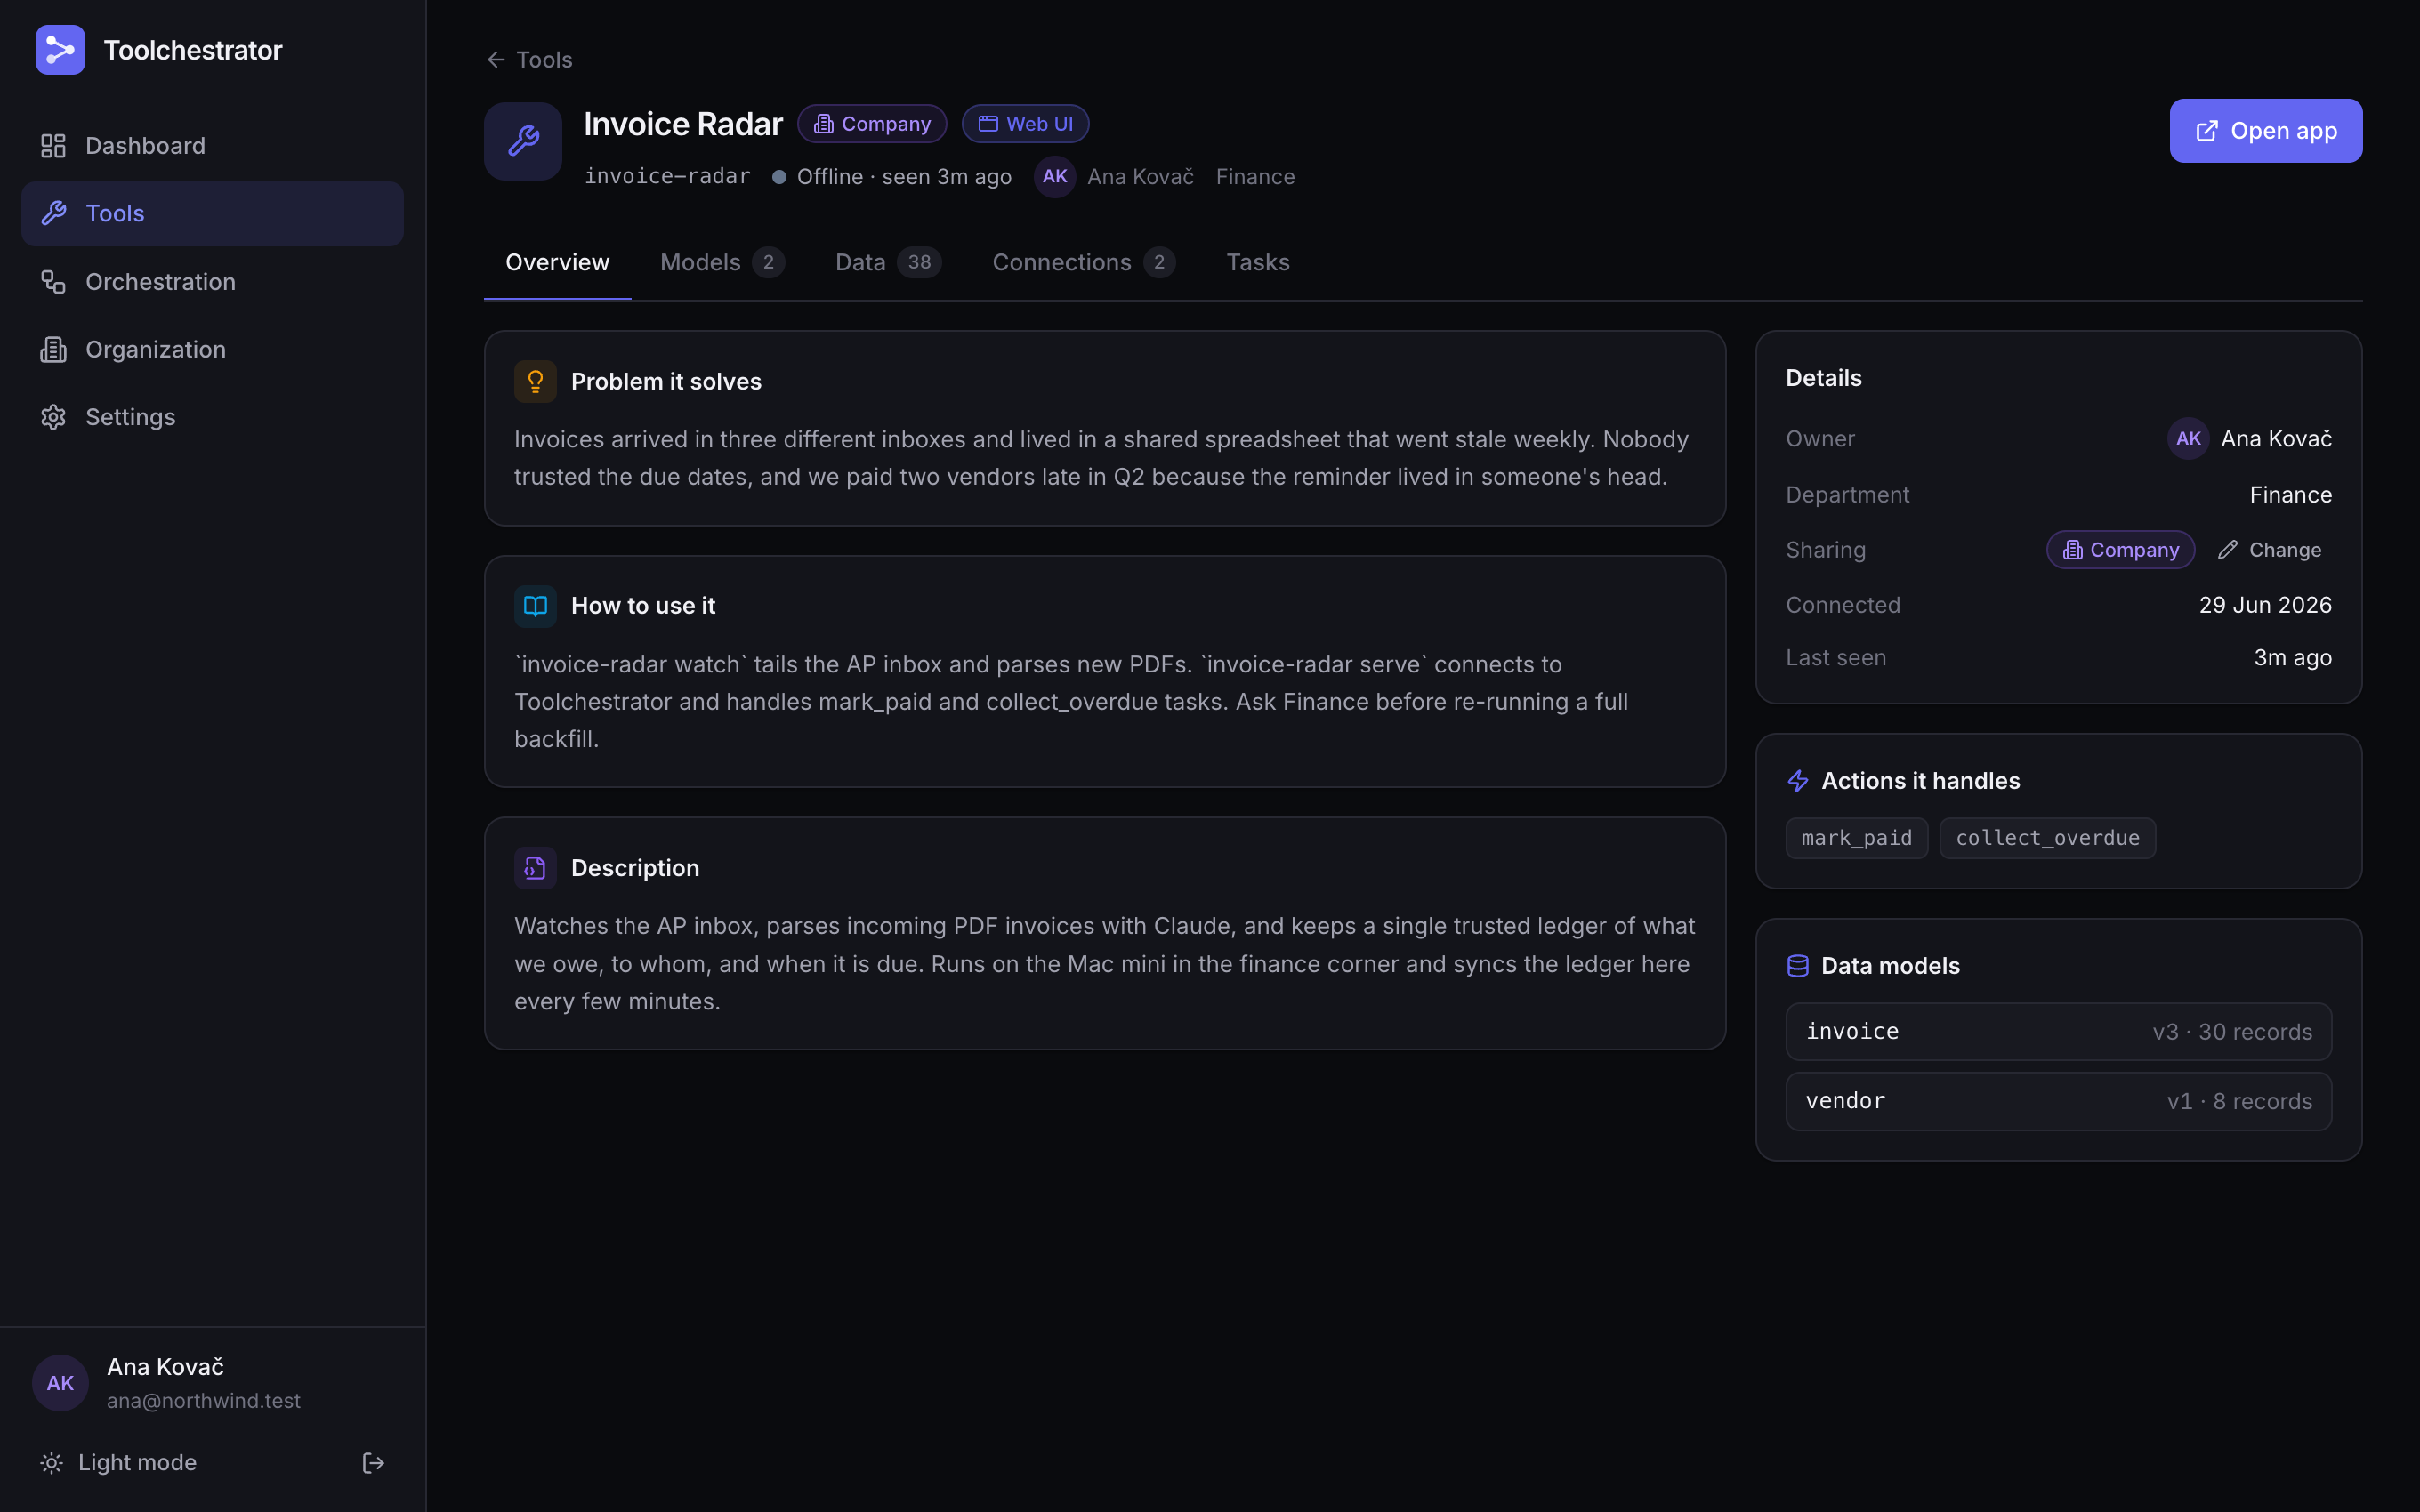
A connected tool's page on the hub: description, problem it solves, usage, data models, actions and an Open app button
Every tool gets a story, not just an entry in a list.

5Choose who can use it

Every tool starts private: only you. When it is ready, hit Change next to Sharing on the tool's page and widen it to a department or the whole company.

One switch governs everything: who can read its data, run its actions, and open its app. The dashboard warns you before you go company-wide.
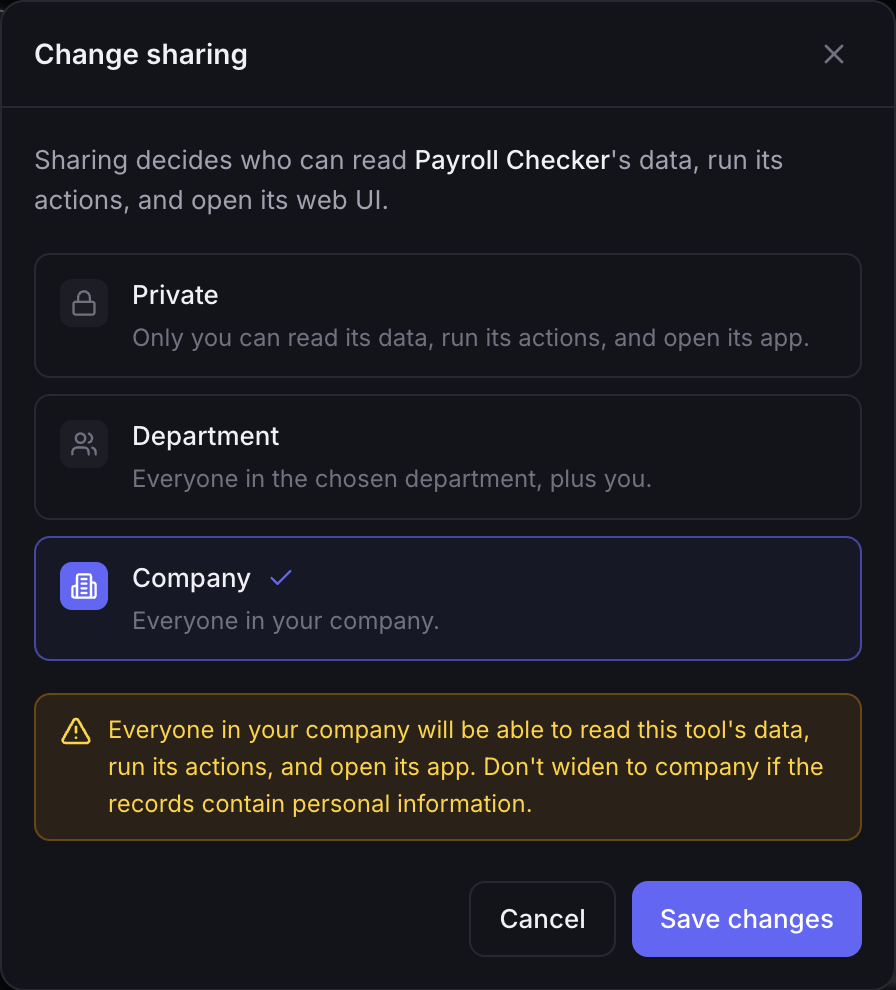
The Change sharing dialog with Private, Department and Company options, and a warning shown before widening to company
Private, department, or company. Your call, changeable any time.
Part 2

Invite your team

Teammates install nothing. They sign up with your invite code, you approve them, and your tools are theirs to use.

6Copy your invite code

On the Organization page you will find the workspace invite code. Copy it and send it to your teammates however you like.

The code alone does not let anyone in; it only lets them knock.

The Invite teammates card on the Organization page, showing the invite code with a Copy button
Organization, Invite teammates: one code for your whole team.

7They join with the code

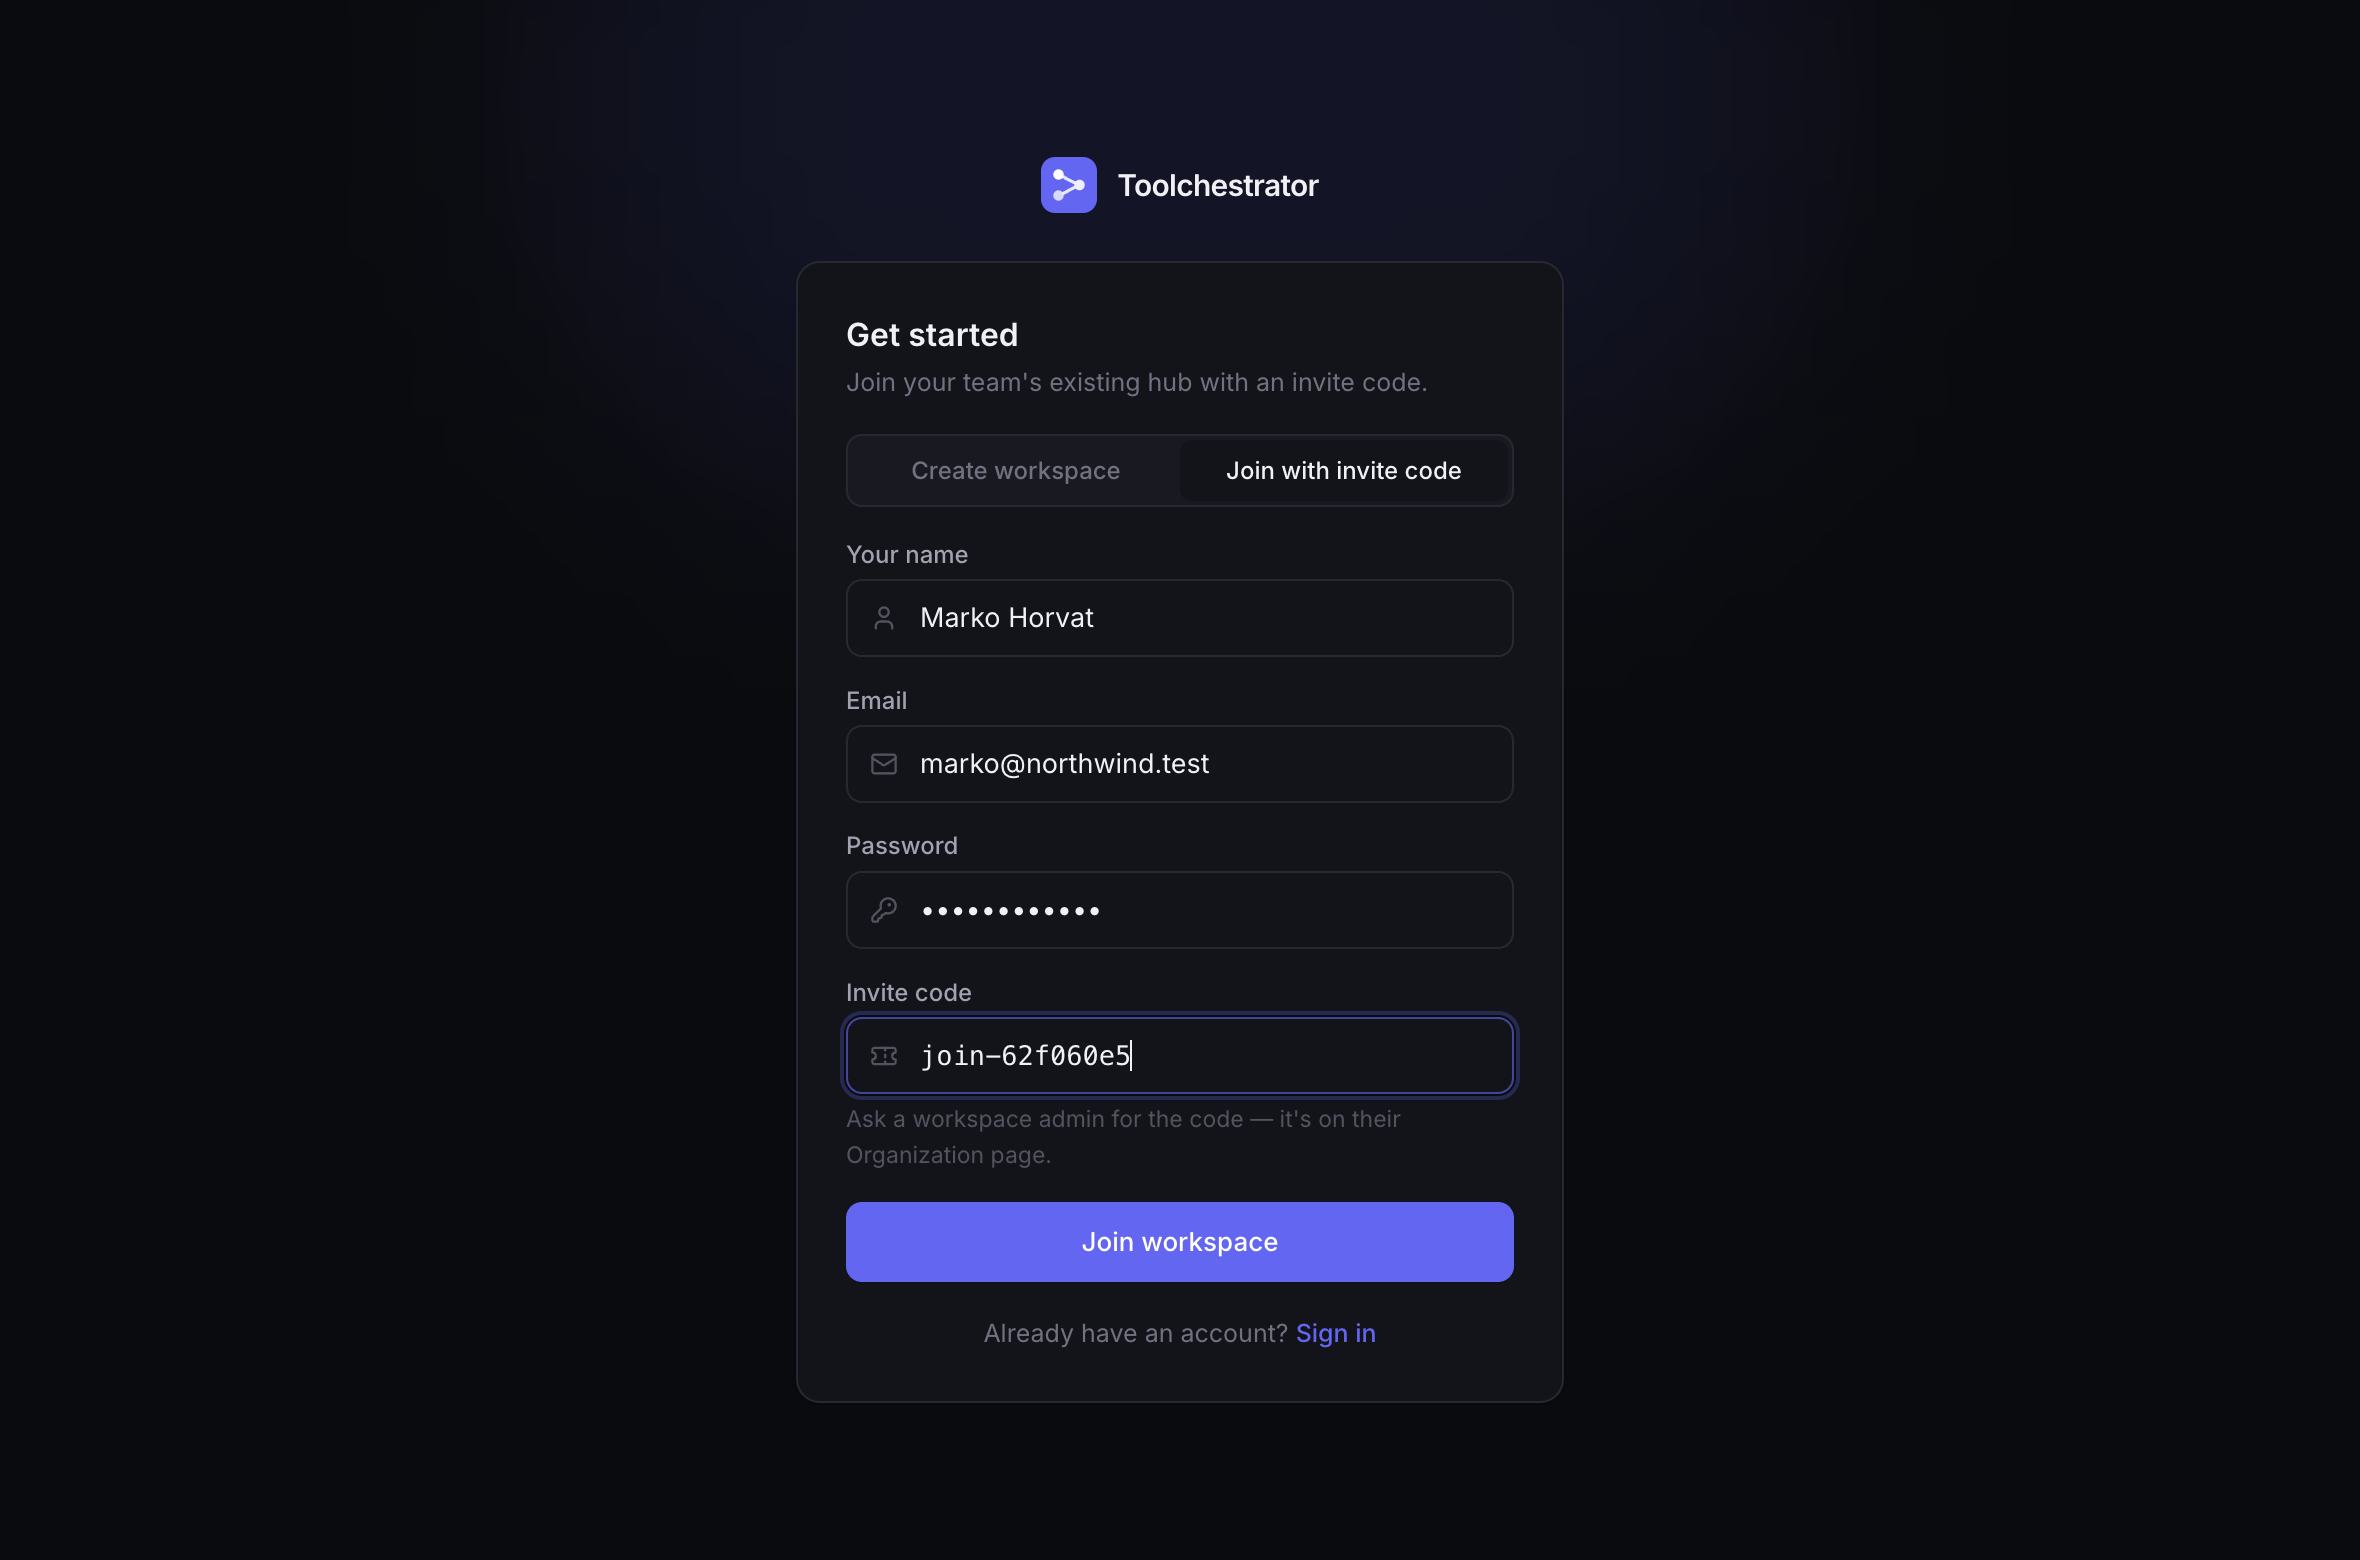
Your teammate opens the same signup page, picks Join with invite code, and enters the code with their name, email and password.

That is the entire setup on their side. No install, no terminal, no Python.

The signup page in Join with invite code mode, with the invite code filled in
The signup page, one toggle over: join instead of create.

8Approve them

New members land in Pending members on your Organization page. Until you press Approve, they see nothing at all: no tools, no data, no names.

An invite code can be forwarded; approval cannot. You always know exactly who is inside.

The Pending members section with a new member waiting and Approve and Reject buttons
Every member is let in by an admin, personally.

9They use your app

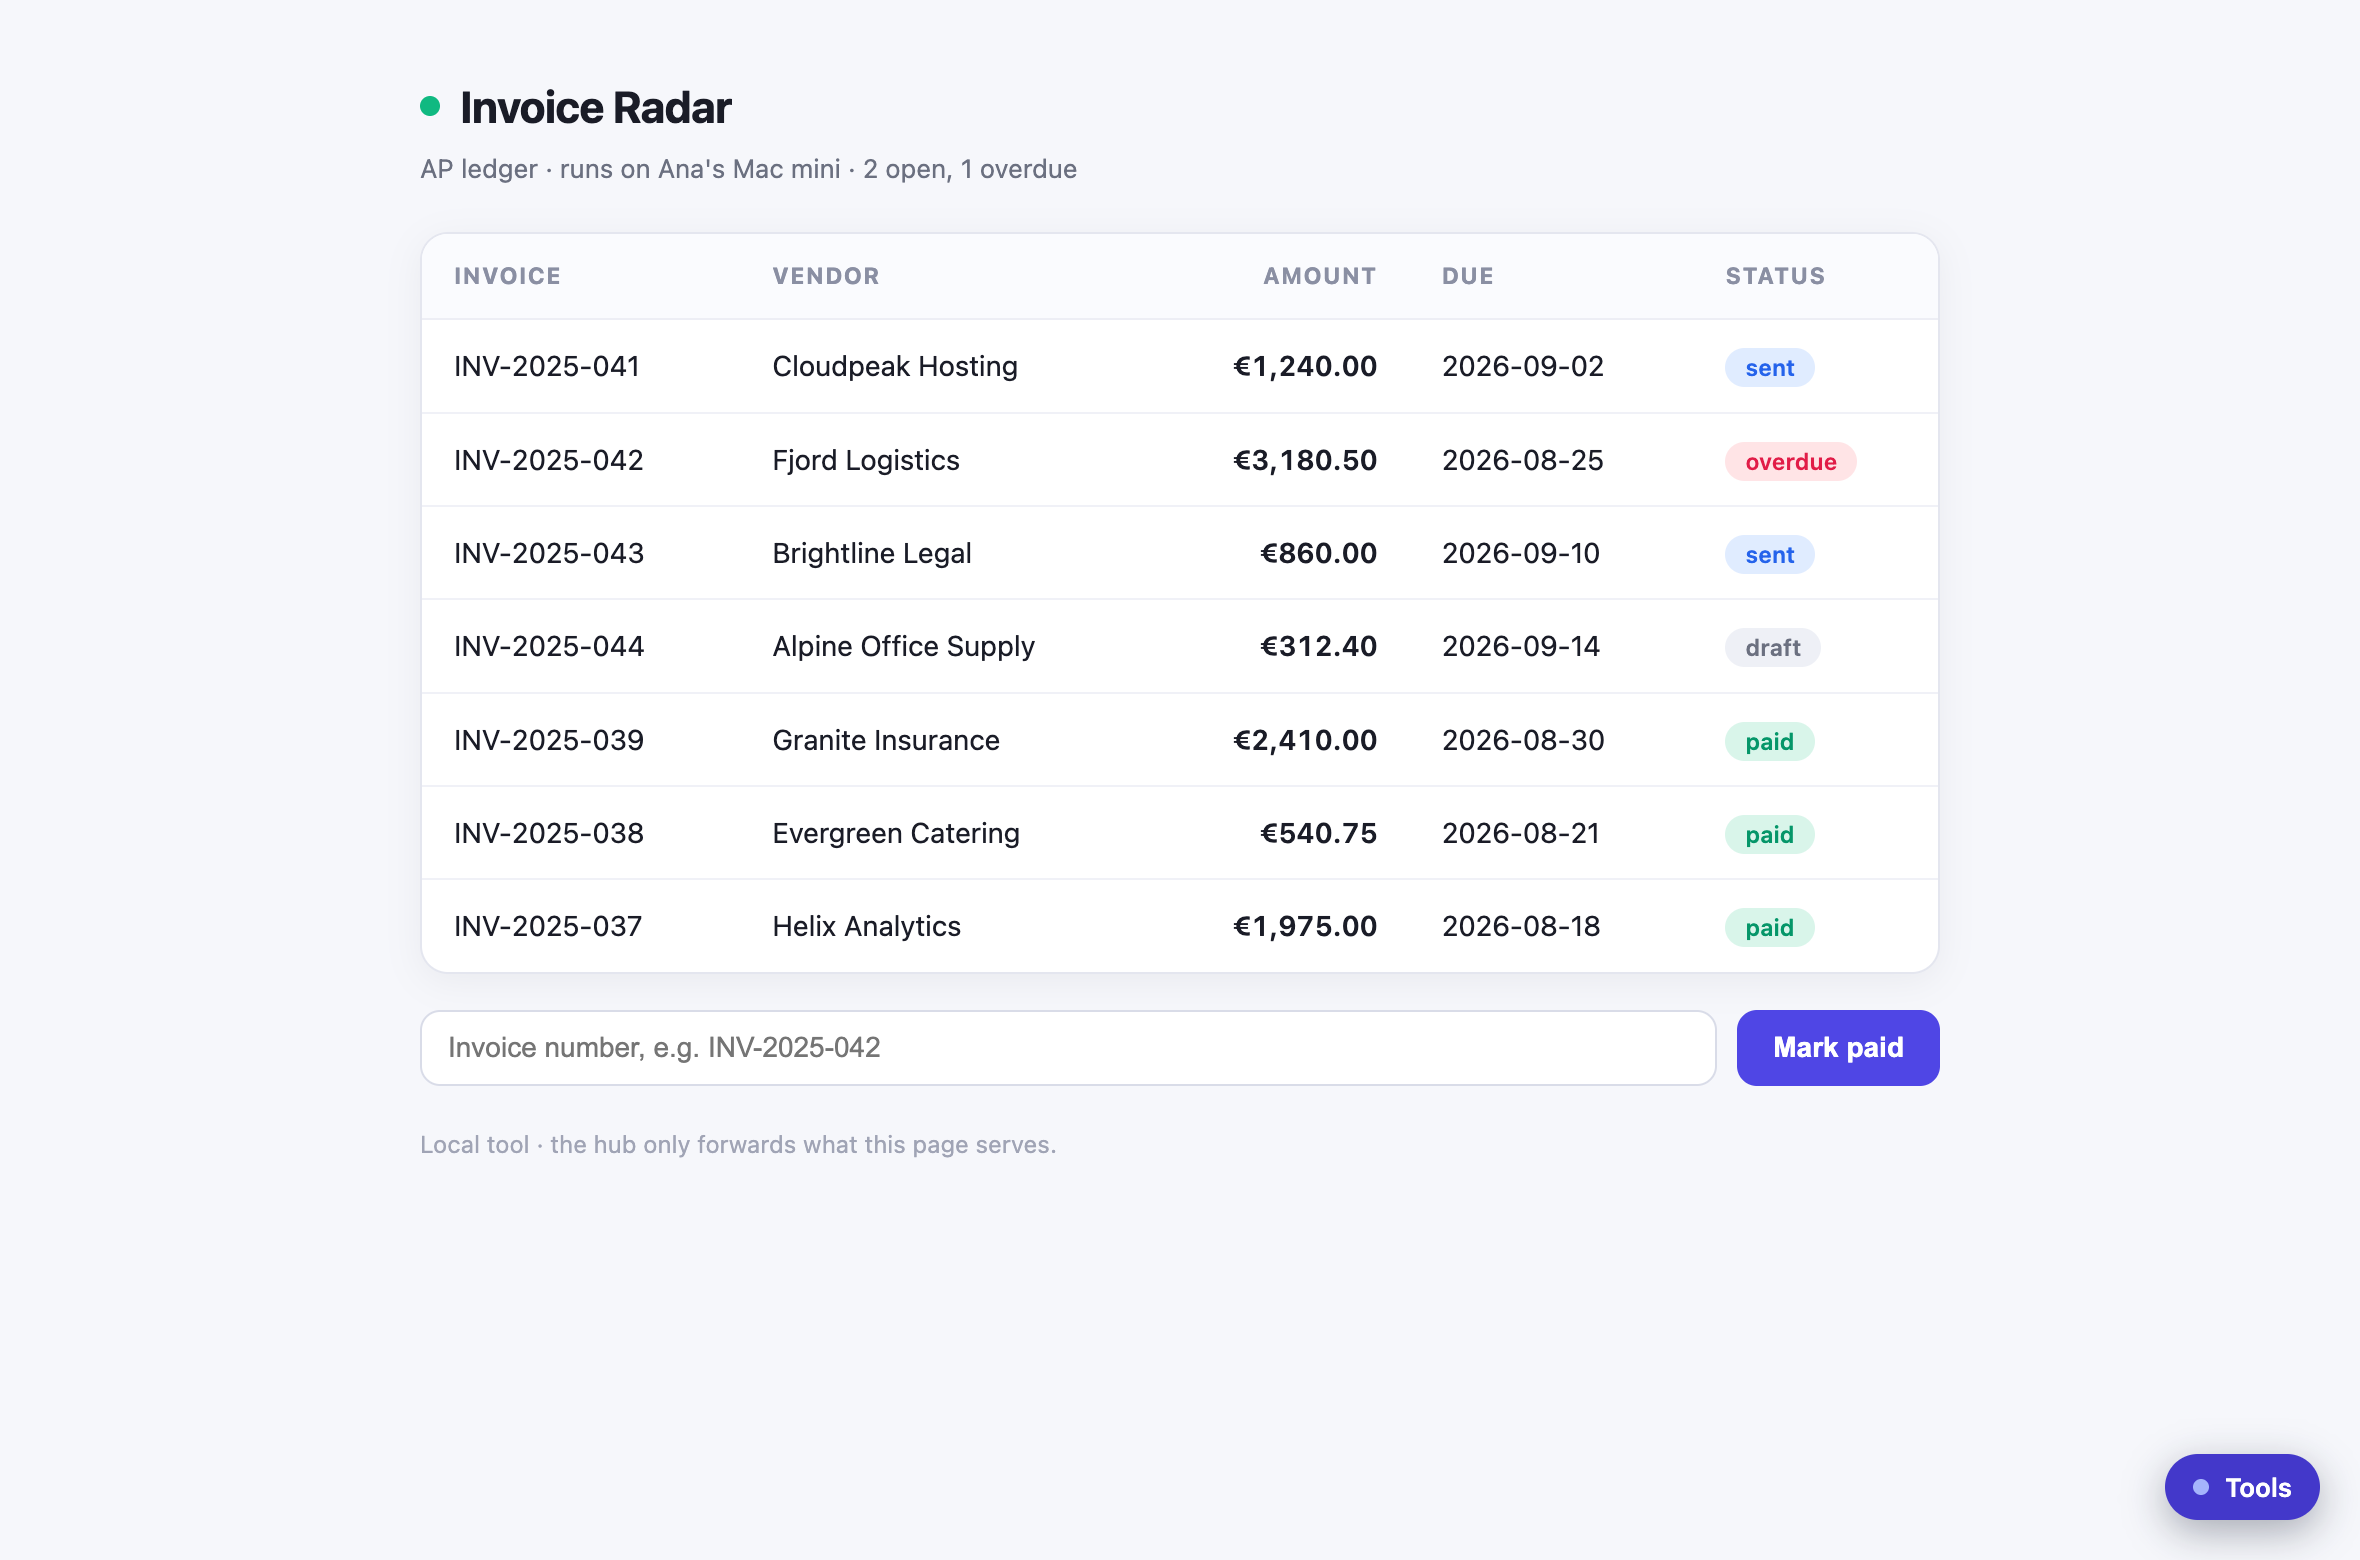
Approved teammates see every tool shared with them: they browse its data with filters, run its actions with one click, and press Open app to use its full web UI, live from your machine, in their browser.

To them it feels like the app runs on their own computer. The floating switcher in the corner hops between all the team's apps.

A tool's own web interface used through the hub in a teammate's browser, with the floating tool switcher in the corner
Your local app, in their browser. Note the switcher, bottom right.

Then it compounds

The second tool someone connects can read the first one's data. The third can react when either changes. The data map draws who feeds whom, live from real usage, and the hub warns before any edit breaks a field a teammate's tool depends on.

That is the point where a pile of personal scripts quietly becomes a system.

The live data map: tools as nodes with connection, subscription and pipeline edges between them
The data map after three tools joined. It draws itself.

Ten minutes, start to finish

Create the workspace now, and the next tool you build with your copilot is born connected.

Create your workspace

Questions first? Read the FAQ or write to me.